Ok, so you might be able to make a flashy map with stairs and ladders, and even add a few playerstart classes, but you have one problem - spawning.
Every good map has a spawn room. It provides clear and quick access to arms, and giving chance for the person to get their bearings on the level before they get a shot in the face with a sniper rifle.
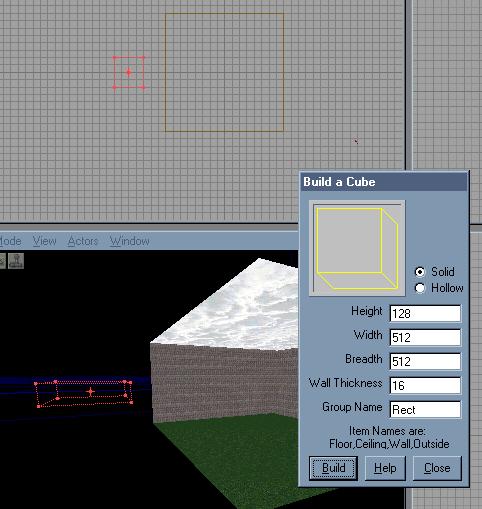
First things first - you'll need some space for your spawn room. If you're planning on having the map played on a large scale, with more than 2 people spawning in one spoawn room, you'll need a good 512 unit clearance, to avoid any nasty spawn problems...
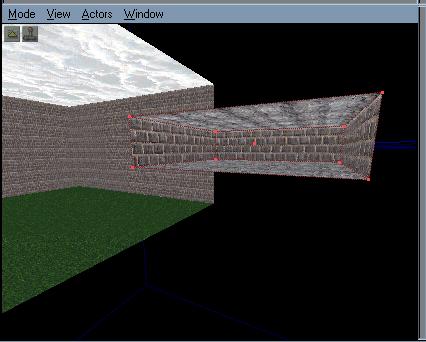
Of course, in my example, the spawn room is cut off from the actual map, simply for perspective. If you want to aim for realism, it is a good idea to incorporate spawn rooms into the playing area, rather than having to cut out a space for a spawn room when you've finished. Once you've made room for spawning, the obvious follows - texturing...
Now what does every spawn room need? Pretty obvious - a few Playerstart classes. You should have already completed the 'My First Room' tutorial, which included how to place spawn points, but just incase you have a foggy memory, this should jog it...
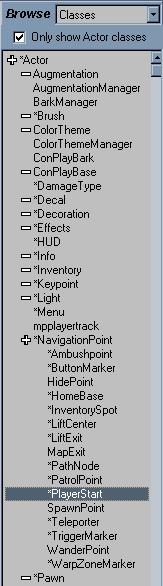
Ever wondered why Playerstart actors have arrows coming off of them when you click on them? Well, its because you can change the way the actor is facing - and yes, you can then change what direction the person faces when they spawn!
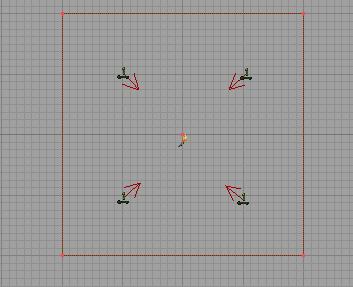
In this scenario, all four people will spawn facing the centre of the room. This can be useful if you want to focus the player's attention on a particular detail, such as an item. Now would also be a good time to add in a light actor, aswell...
The next step is the tools of death; the things that every DXMP map needs - weapons.
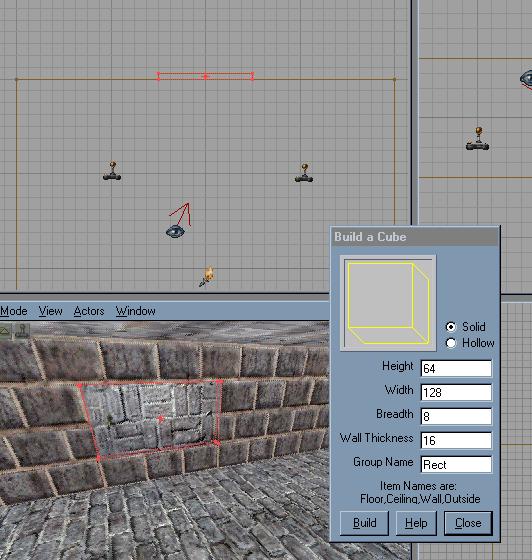
If you've played DXMP before, no doubt that you've already played DXMP_Smuggler. The weapons in the map's spawn rooms were made to stand out from the crowd by mounting them on walls - now it's your turn to learn from example. Create a brush, 64 tall, 128 wide, and 8 breadth. Move it towards the outside of the wall, and subtract to make a very nice looking cavity in the wall - not hard to miss from the rest of the room now, is it?
This is where you're going to put your weapons.
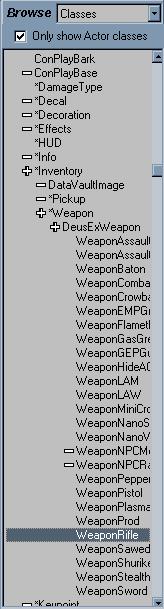
Now, weapons are easy enough to put into a map. open up your Classes browser, and look down the list until you get to Inventory, then *Weapon. Expand DeusExWeapon, and select WeaponRifle. This is the sniper rifle for Deus Ex, and unless you hadn't caught on yet, that whole list of weapons are the weapons used throughout the game. It might be a good idea to go over all of the weapons, and seeing what they all are.
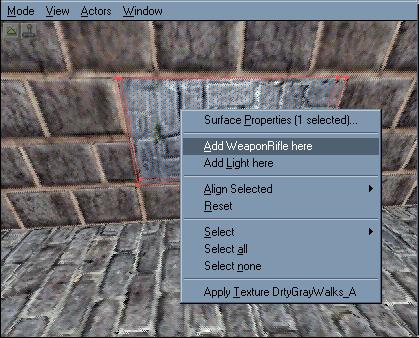
Once you've selected the WeaponRifle line, right click on the back wall of your newly acquired hole in the wall. Click on the line Add WeaponRifle Here, and your rifle should magically appear before your eyes!
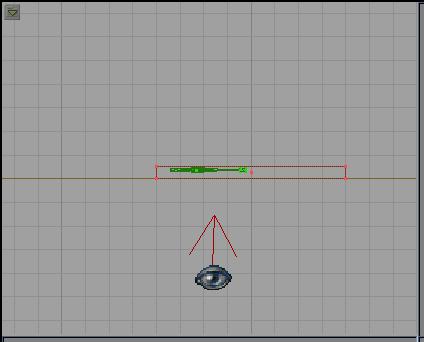
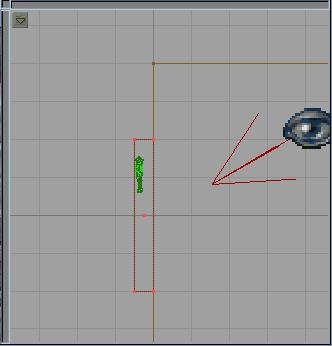
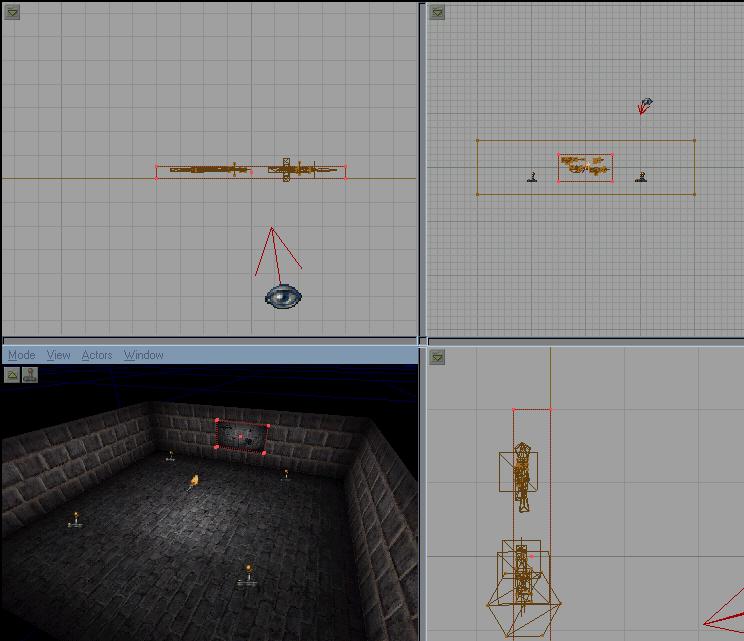
Wait a minute - the weapon is all wrong! you want it parrallel with the wall, no? Easy enough, simply use the three geometric views to position the rifle where you want it, using the control key, and right mouse button to rotate it...
Top View
Side View
Now, this is important. At the moment, when you spawn in-game, the weapons will fall to the floor. if you want the weapons to stay wall-mounted, such as DXMP_Smuggler, you will need to go into the weapon's properties, and expand the movement line. Change the line PHYS_Falling to PHYS_None. What that means, is that instead of the weapon falling to the ground, it will not move at all, and stay in the same spot that it had started in.
Once you're happy with the positioning of it, you're done - simply add more weapons and rebuild...
Et Voila! You've just learnt the basics of spawn rooms - there are many different ways you can create spawn rooms. Creativity is one of your greatest weapons in sculpting a map that stands out from the crowd - take a look at other people's maps, and see how they've done it!
Jon