In this tutorial, I will be covering three commonly-used types of mover: Standard Doors, Double Doors, and Elevators.
There is also an appendix on common mover functions, and I will most likely update this tutorial again at a later date.
Part I: Standard Door (This part will be referenced by other parts of the tutorial)
So, first thing you need to do is size the red brush so it fits the place you want to put a door (in the example shot, this is 128x64x8, but obviously this will be different for your map. 4 is a better thickness for doors in general.)
Then put this brush in a wide open space (many mappers have a hollowed-out cube separate of the main area for this kind of thing, but I simply prefer to do it in the middle of whichever room is closest and is big enough)

Now you have your brush, click the 'Add Brush To World' button (CTRL+A for the lazy) and texture it. Try to keep with the general theme of your level, so, for example, if your level is a warehouse, then go for a door texture from a package like CoreTexMetal, but if you're making a largely indoor map (like the inside of a hotel), take something from CoreTexWood. Obviously, these aren't the only two packages with doors in them, so experiment with others until you find something that works.
You'll most likely find that the texture does not fit your door. If this is the case, click one of the sides of the door, hit Shift+B to select all sides, and then hit F5 to bring up their properties. Select the 'Scale' tab and play around with the options there until it looks right. {Note: You can enter your own numbers in the Simple Scaling box if you wish} Most door textures are 256x128, so a simple scaling factor of 0.5 is all that was necessary for my door.
Now here's the important bit - the one most people forget about and complain to me when they find out their mover doesn't work properly.
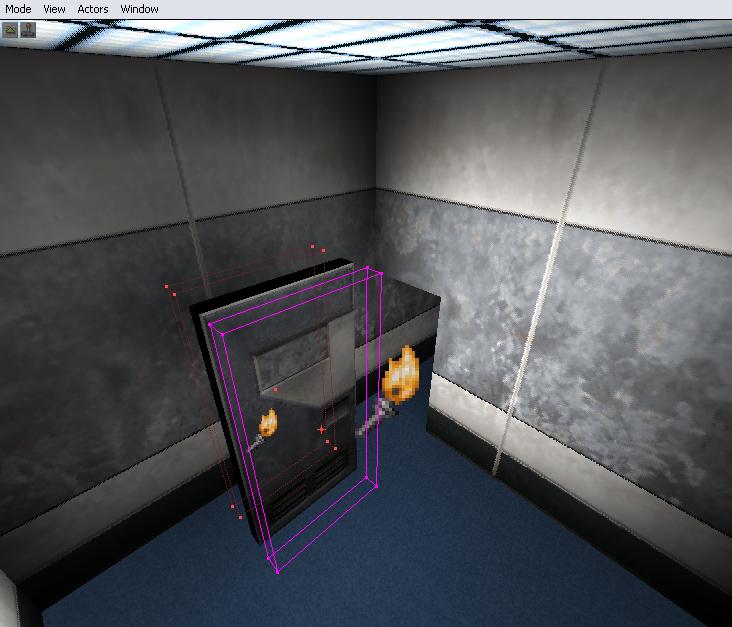
Anyway, resize the red brush to be a few units larger than your door, and centre it on the door so that the entire door is contained within it, with room round the outside. (Make sure to check all three 2D views)
Before you get trigger-happy though, select 'Brush->Mover->DeusExMover'
Don't click yet though. First, you have to copy textures onto the red brush, a simple task - all you have to do is click the 'Intersect Brush With World' button
And finally, you can click 'Create Mover'
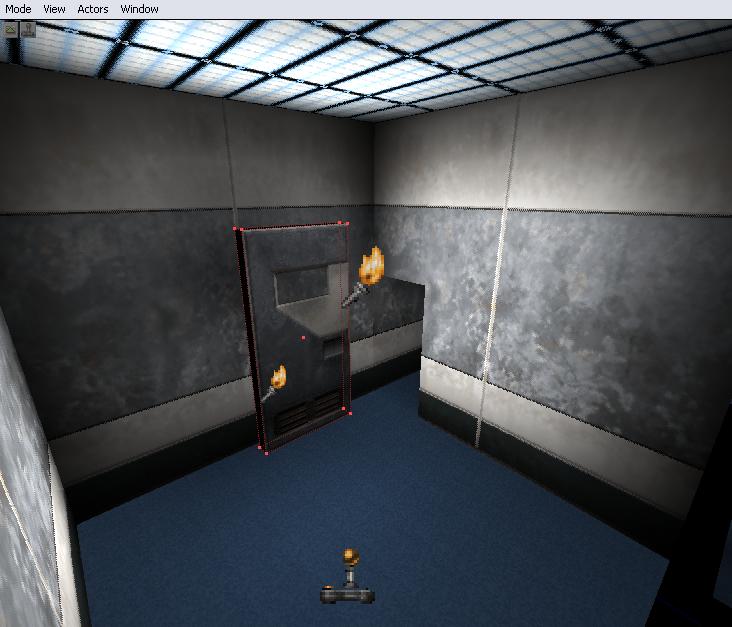
Several things remain though. I'm sure you have the sense to move the door to where you want it, but before you do, don't forget to move the pivot point to a corner of the shape by clicking on any vertex of the mover while it is selected (if it snaps to a corner or something, then move the mover away from the wall and try again).
Now you need to set keyframes - the places your door will be at when it's open or closed. You currently only have the closed one (which should be sitting in the doorway right now, pivot safely attached to a corner of it)
What you need to do is right-click the Mover and go into the Mover Keyframe menu. For most doors, all you'll ever need are keys 0 and 1 - but for elevators, you may need to use more than two keys - more on that in the Elevator section. Either way, click 'Key 1'
To actually make your door openable, all that remains is to rotate the mover around its keypoint to an open position, look in the 3D view and check it's right, then right-click your mover and select "Mover Keyframe -> Key 0(Base)" (unless you want your door to be open by default, in which case you can leave it on Key 1)
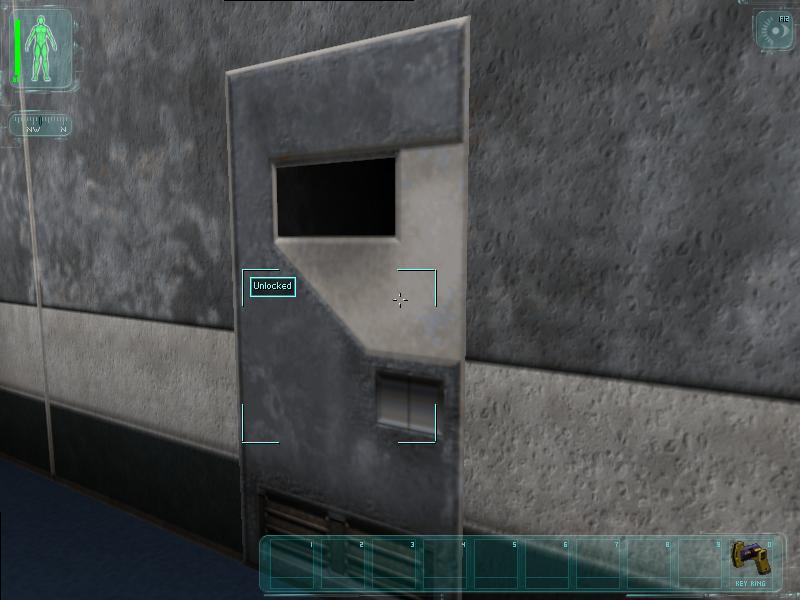
So there you have it! One door! Give your map a rebuild, save it, and test it to see if your mover works!
Part II: Double Doors
Proceed to make your mover as outlined in the tutorial above. When you're done, give it a tag in its 'Events->Tag' property. Then, copy and patse it (Note - You can use the duplicate function, but I find two bad things about it: it doesn't preserve the tag, and it can screw with the mover's pivot. So CTRL+C, CTRL+V all the way!)
While I'm on the subject, move both your doors into their doorway, and move the pivots so that they are attached to the walls closest to them (ie. at opposite corners). I would highly suggest that you mirror one of the movers in the Y axis and reposition it, to make things look better. Check the keyframes, and adjust as necessary.
The thing that makes Deus Ex believe your doors are meant to be double doors is the tag. Because they both have the same tag (or, they should do), Deus Ex will operate them both when either one is frobbed (UnrealScript term for 'interacted with')
Well, rebuild, save, and fire your map up, and you should have a set of double doors!
Part III: Elevators
Elevators are a world away from the simple doors we've worked with before. People will try to tell you that CaroneElevator is the only way to make a half-decent elevator, but I wouldn't be typing this now if I didn't believe that what everyone else says is crap. Enough of my rambling though.
First thing you'll want to do is make your elevator box (ie. What players will stand in). Using a hollow brush is recommended, as having too many intersections on a mover can become buggy.. Of course, your elevator doesn't have to be a boring box, but that's the most common use for it.
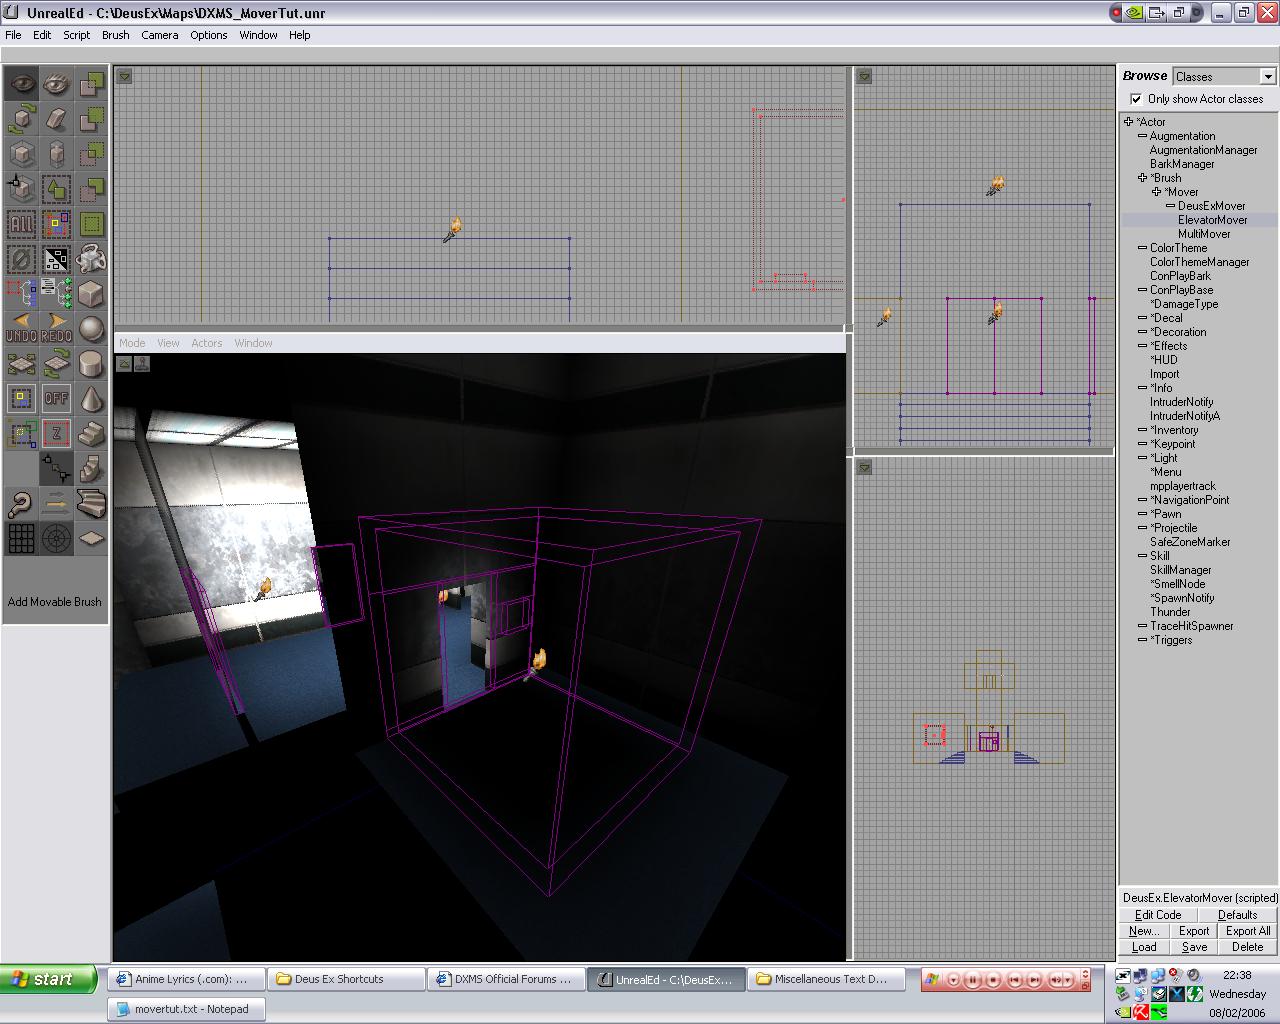
Anyway, once you're done, open the Classes browser and select 'Brush->Mover->ElevatorMover', then copy textures to the brush like you did with previous movers. Then press 'Create mover' and you have one elevator =) Move it into the shaft at one of the stops you want it to be at.
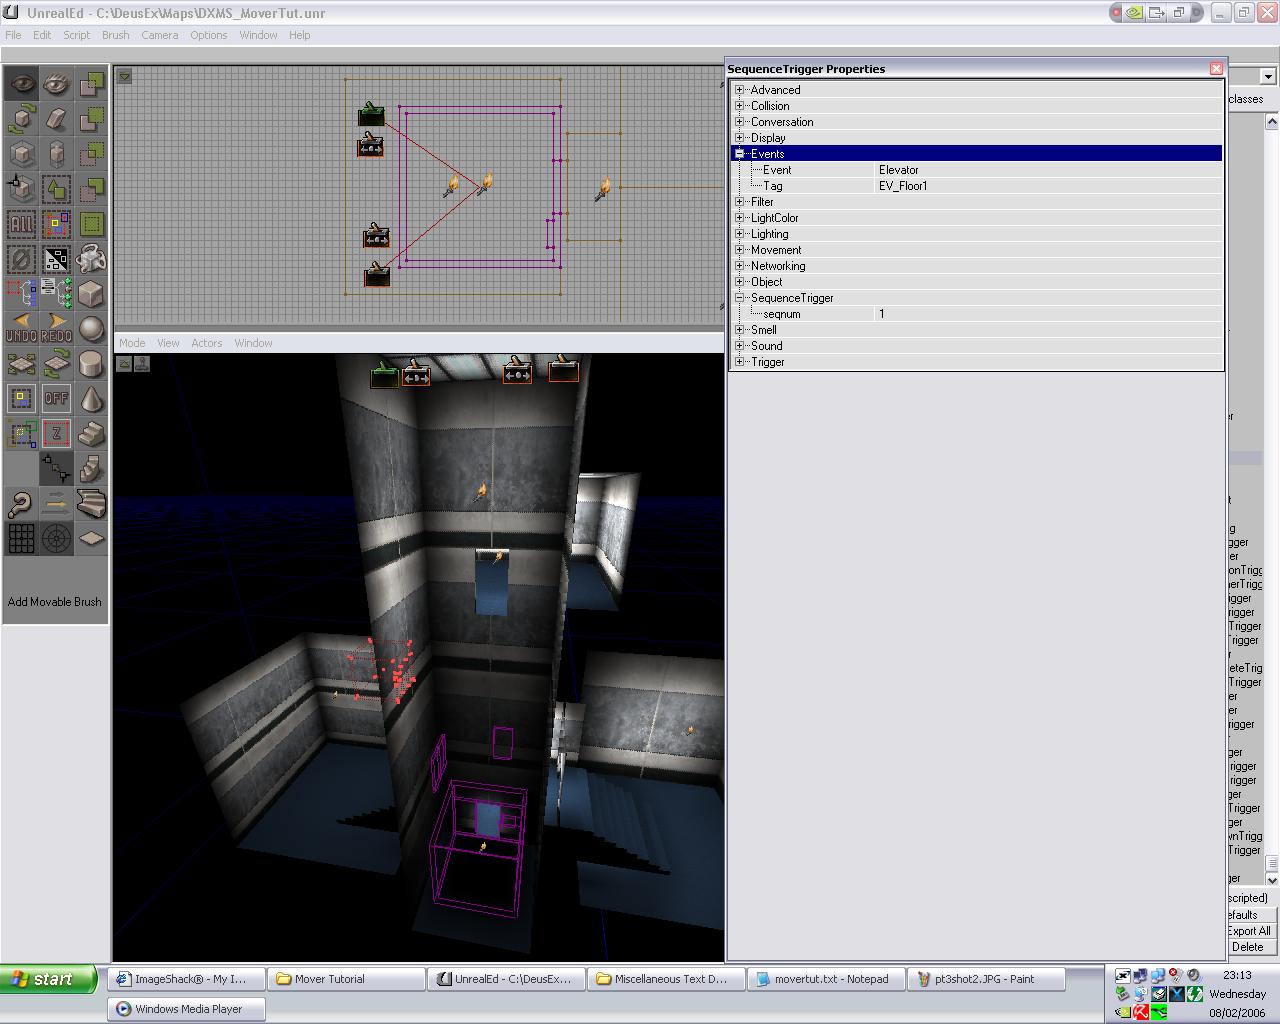
Getting Elevators to move is more difficult - just setting the keyframes doesn't do anything. The way to move any Elevator is by using SequenceTriggers. These are found in 'Triggers->Trigger->SequenceTrigger' in the classes browser, and are used to make a mover jump to any one of its movement keys. There are a total of 8 programmable movement keys - or, to us elevator builders, 8 floors. To start with, let's just have two floors.
You assign keyframes on Elevators in the same way you do on any other mover, but instead of rotation, you have to physically move the whole thing (just like a real elevator :)). So set your keyframes now, and remember which number goes to which 'floor' - you'll need this data soon.
Find an empty spot near your elevator (I tend to add a bit to the top of the shaft for this) and put in one SequenceTrigger for each stop on your elevator. If you want to add doors to your elevator (which I will be doing), then also place a 'Triggers->Dispatcher' for each stop too.
Now, we're going to make a few changes to our Elevator. First, bring up its properties, and expand the 'Mover' property. Set the 'MoverEncroachType' to 'ME_CrushWhenEncroach' and the EncroachDamage to something ridiculously high (I use 25000). Set the MoveTime a bit lower (5 is a good one for small elevators), and give your Elevator a tag.
Put this tag in the 'Events->Event' property of one of the SequenceTriggers and press Enter. You should now see a red line connecting the sequenceTrigger with the elevator. Give that SequenceTrigger a descriptive tag, for example "EV_Floor0" or something similar. Look at the 'SequenceTrigger->seqnum' while you're there - you'll need to change this on the other SequenceTrigger to be 1. Again, set the 'Events->Event' tag to the Elevator's tag, and give it a descriptive tag (mine will be "EV_Floor1")
So now we have the triggers to move the elevator. But what triggers those triggers?. The answer is BUTTONS (we will use 'Decoration->DeusExDecoration->Button1' for this). You will need 8 buttons for this elevator (4 if you are not using doors) 2 are for inside the elevator, 2 are call buttons, 2 go in the elevator shaft and control the doors, and the other two go on the outside to open the doors.
So place all these buttons in. This can get confusing, I know, so it helps to put each button exactly where you need it before you start - that way you won't forget later.
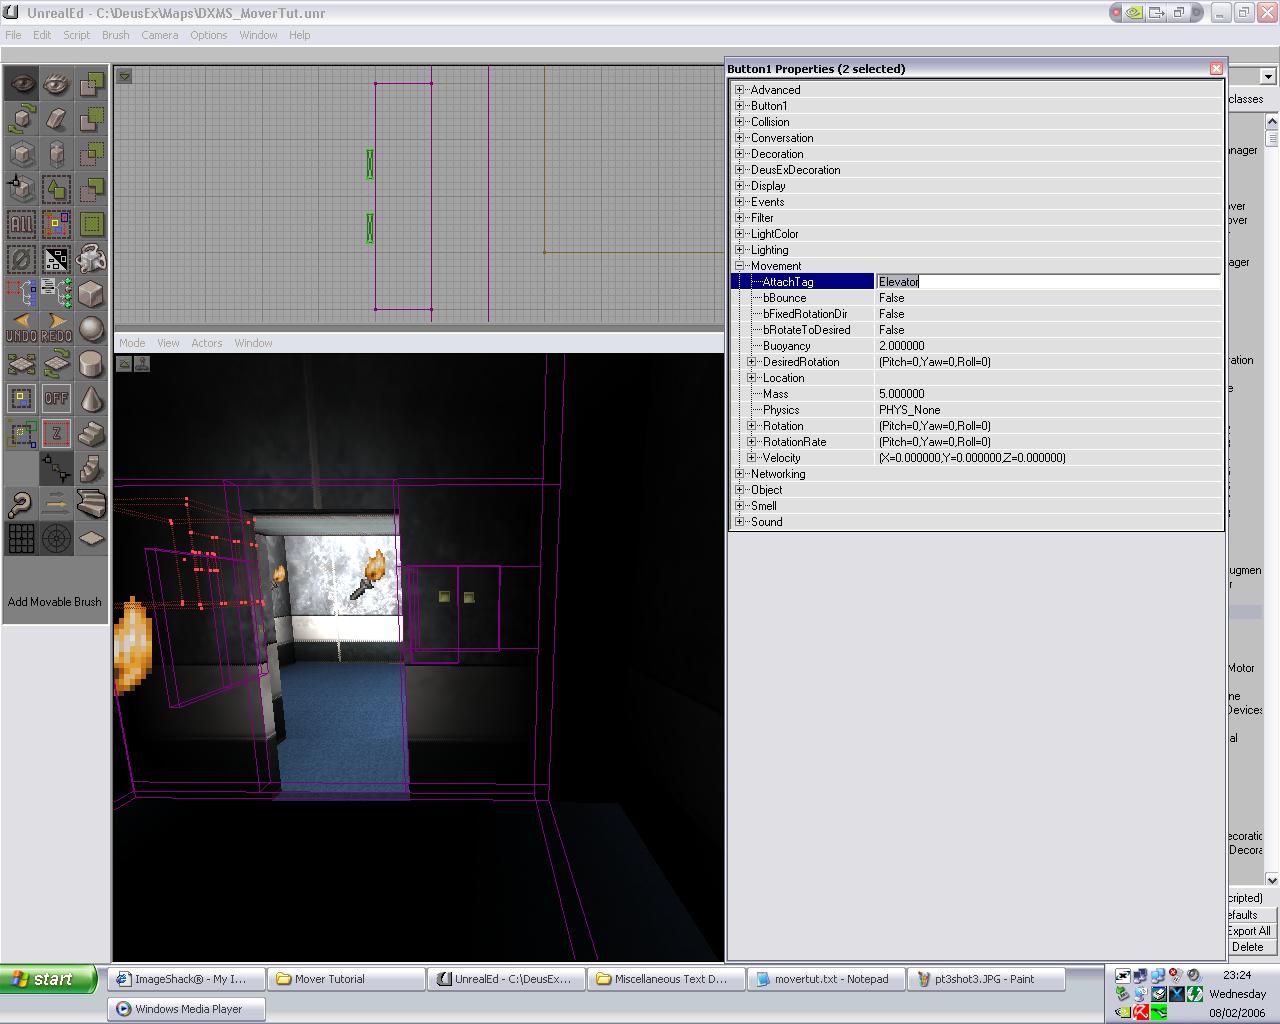
The two buttons inside the elevator are special. In the overhead view, line them up with the edge of the mover brush and then bring up both their properties. What you do here is you set their 'Movement->AttachTag' to the tag of the Elevator (this makes the buttons move with the elevator, see :)) Then select eah individual button and set its 'Events->Event' to one of the SequenceTriggers (These buttons don't need tags, but I put them in anyway) For this two-floor system, we can also retexture the button class by changing the 'Button1->ButtonType' option. You can either use numbers, or Up/Down.
Next up are the call buttons. These are easy enough, they're just like the internal buttons, but you don't need an AttachTag, and you have to set the Event to the SequenceTrigger that would ordinarily bring you to that floor.
For the next 4 buttons, we need to add the doors, so create them now and give them unique tags (EV_TopDoor and EV_BottomDoor are what I will use). One or two things need to be set first - set "Object->InitialState" to 'TriggerOpenTimed', and set 'DeusExMover->bHighlight' and 'DeusExMover->bFrobbable' to False. Now, you can set the other two outside buttons to work these doors, as well as the two buttons in the elevator shaft.
If you were to test it now, the elevator would work perfectly well, but the doors wouldn't open when you wanted them to. I also bet you're asking yourself "Why did he make us put Dispatchers in?" Well, be patient, young one. I'm about to tell you.
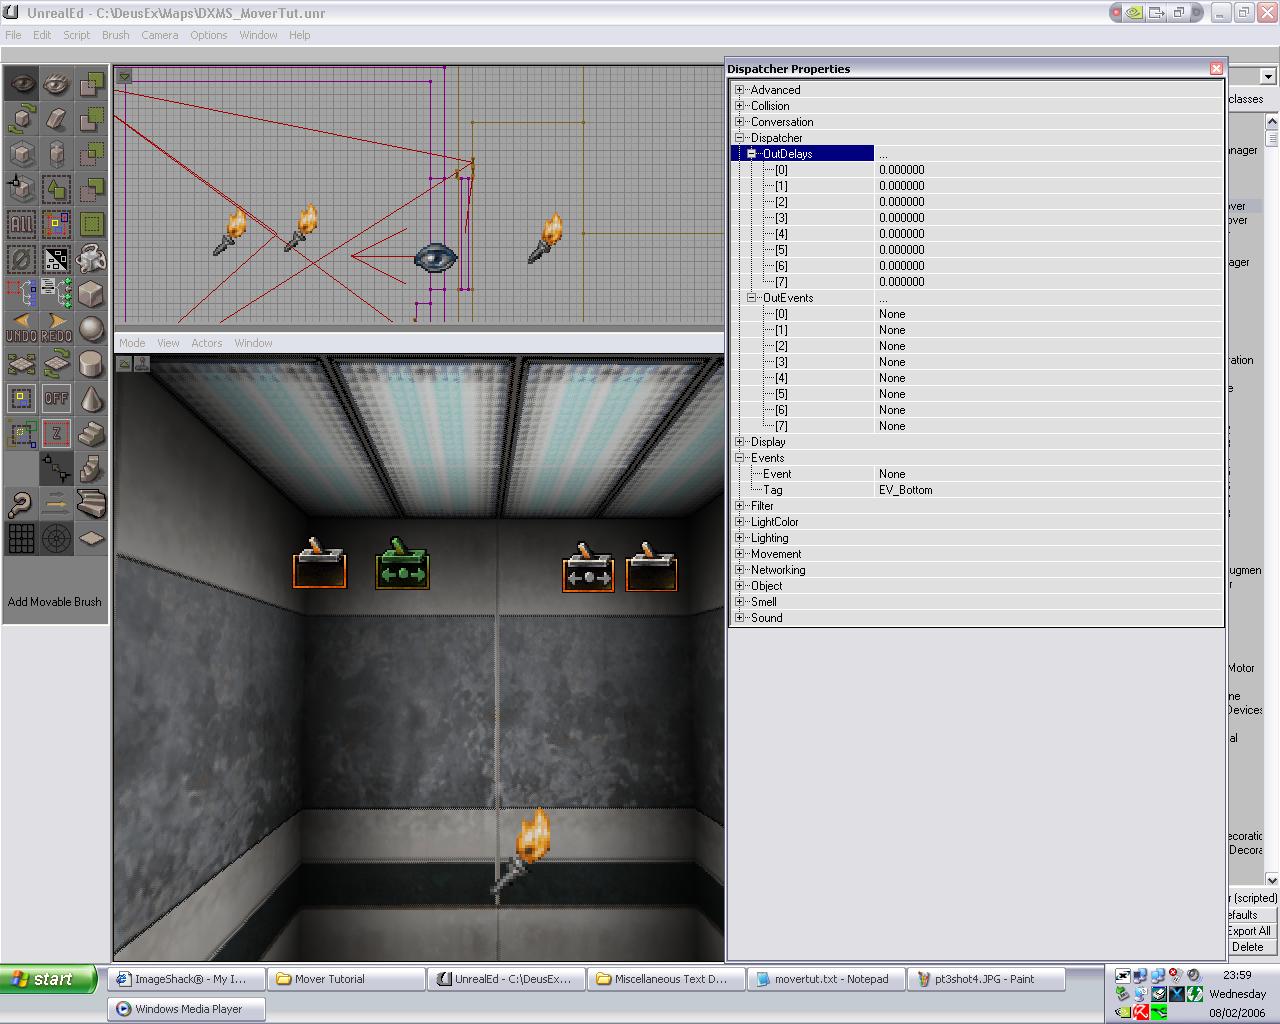
The purpose of those Dispatchers is to fire a number of different triggers (up to 8, but we're using just two). These Dispatchers should be given simple tags (EV_Top and EV_Bottom will be mine), and then expand both 'Dispatcher->OutDelays' and 'Dispatcher->OutEvents' and you're confronted with this:
Don't panic: You just have to put the tags of the Triggers you want to fire in the 'OutEvents' section, and the delys in the 'OutDelays' section. The delays occur before the action is carried out, so an action with a delay of 4.000000 will not start until 4 seconds have passed. So, for this Elevator, you need to put the following commands in (this is for the 'Bottom' Dispatcher)
OutEvents<0>=EV_Floor0 (or the tag of your bottom SequenceTrigger)
The same would apply for the top one, but replace the tags with the ones for the top of the Elevator instead (delays remain the same).
What this does is it first sets the elevator off moving down to keyframe 0 (the bottom floor). Because our Elevator's MoveTime is set to 5 seconds, as soon as the elevator arrives at its destination, the door will open.
Before it can be used, though, you need to reassign the Events on the buttons inside the elevator and the call buttons to match the tags of the relevant dispatcher.
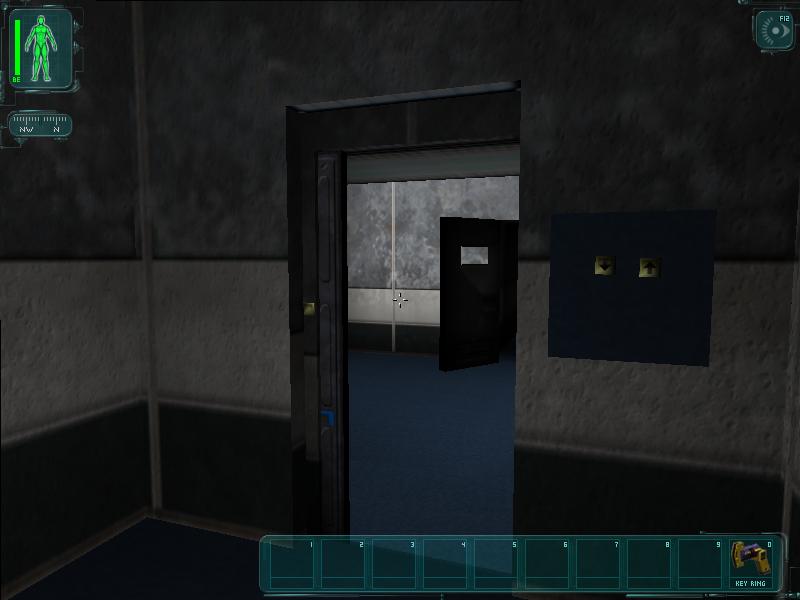
Rebuild, save, fire it up and you should have an elevator. With doors!
Appendix 1: Mover Properties
There are various properties that can be set on a mover. These are the most important.
bBreakable - This dictates if your door can be broken by weapon fire (like the ones in Smuggler)
There are a few more important values under the Mover section:
StayOpenTime - Only used on OpenTimed doors, this dictates how long the doors stay open.


OutEvents<1>=EV_BottomDoor(or tag of the door at the bottom)
OutDelays<0>=0.000000
OutDelays<1>=5.000000 (or MoveTime of your Elevator)

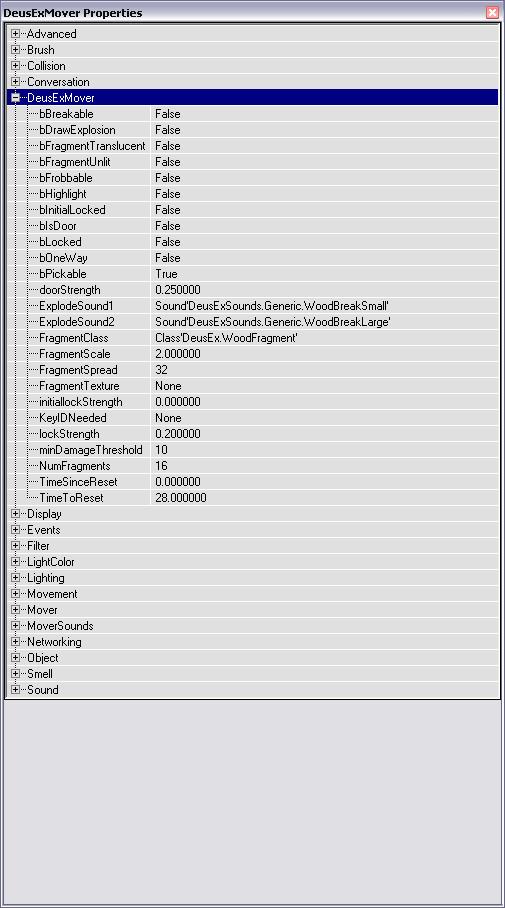
bFrobbable - This dictates if a door can be operated by right-clicking.
bHighlight - This will show or hide the little indicators you get on your screen when you're in range of the door.
bLocked - Self-explanatory, it says whether your door is locked or not.
bOneWay - A property often used to prevent spawnkilling, this ensures a door can only be opened from one direction - the direction the arrow points when the mover is selected.
bPickable - This dictates whether the door can be unlocked by using lockpicks.
doorStrength - The strength of the door, or how much firepower it takes to break it. From 0.000000 to 1.000000
lockStrength - This is how hard the door is to pick open. 0.000000 to 1.000000
TimeToReset - This property is how long a door will stay open (in seconds)
MoverEncrachType - This property dictates the behaviour of the mover, should it be obstructed by an object. ME_IgnoreWhenEncroach is the most commonly used one, but for elevators, ME_CrushWhenEncroach is more often picked.