Step 1: Making space
Ok, open up your Deus Ex SDK, and right click the 'cube' button, and select 'Cube Properties...'. Now in the window that appears,
input a height of 1024, a width of 2048, and a breadth of 2048. Click build, and a red frame should appear on the 3D window.
Now click the 'subtract brush' button, and you should see the following shape in the 3D view.

Click and hold the left mouse button on the 3D window, and move the mouse to move around in that view to get a better picture of the shape. To look aroudn your map, simply press and hold the right mouse button and circle your mouse to look around.
Step 2: Giving Texture
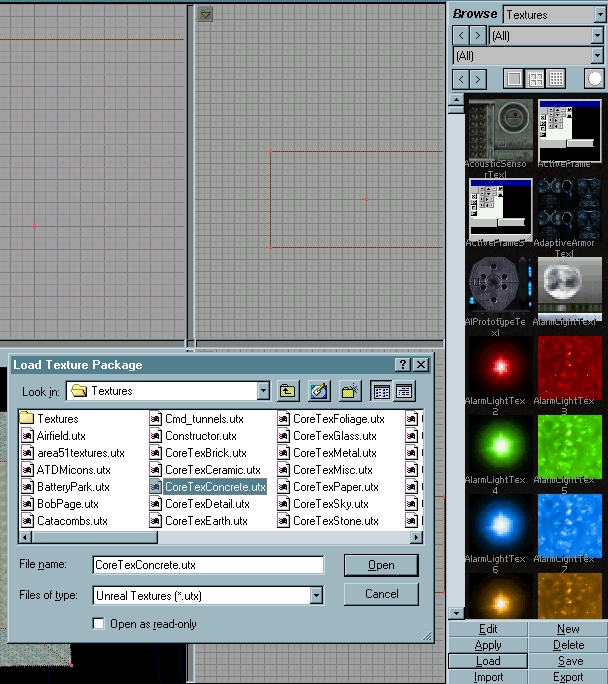
In the 3D view, left click one of the sides on the shape you've made. It should turn light blue/ blue dotted. now in the top drag down menu on the right hand side of the SDK, you will find 'Textures'. select it now. Look at the bottom of that column to find a series of buttons, one of then saying 'Load'. Once clicked on, it will prompt you with a file window. Find the file 'CoreTexConcrete.utx', and open it up. A whole new set of pretty texture samples will pop up on the right hand side.
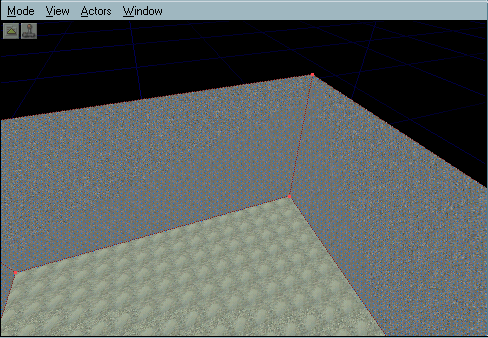
Simply choose a texture from the new set of textures, and take a look at your 3D image. They actually look like walls now!
Move around in the 3D view to texture ceiling and floor for your new room, and go on to step 3.
Step 3: Illumination!
At current, your room may look pretty good with the texture in place, but you didn't think of lighting. The only way a player can see your lovely walls right now is to use a flashlight, because its pitch black, contrary to anything you might think. So now we add lights.
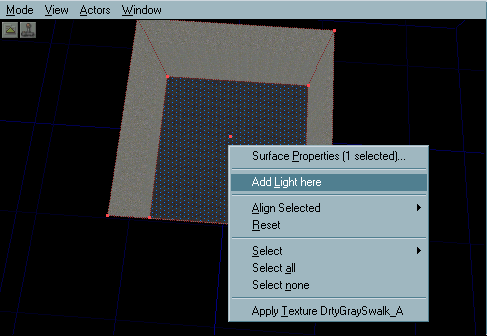
Simple and easy. Move around on the 3D view so you have a square on shot of the floor of your room. Now right click on the floor, and select 'Add Light here'. Once clicked, you will see a small torch picture sitting in the 3D view where your light is supposed to be.
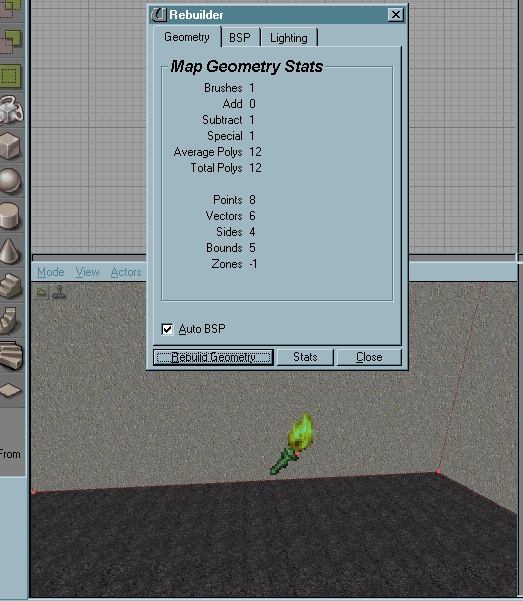
This is your light. Click on it so it turns green. Ok, now the fun part - moving your light. Hold the 'ctrl' key, and also hold both mouse buttons whilst dragging forwards to elevate the light, and the left mouse button drag and right mouse button drag will move the light side to side. Try and get the light into the centre of the room. Now press F8.
You should see a window pop up, showing lots of random information about your map. Ignore that, and focus on the buttons at the bottom of that window. Click the one that says 'Rebuild Geometry', and your light will actually light the room!
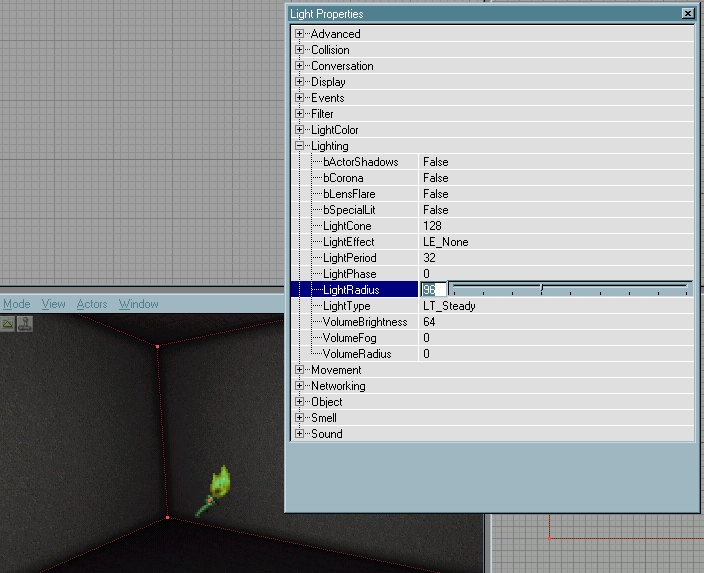
Looks good, but would a room be that dark? I think not. Heres how to change it. make sure the light is selected. Right click on it, and select 'Light Properties'. A new window will pop up with lots of expandable menus. Double click 'Lighting', and click once on 'light radius'. At default it is 64, change it to about 100 for more light in your room.
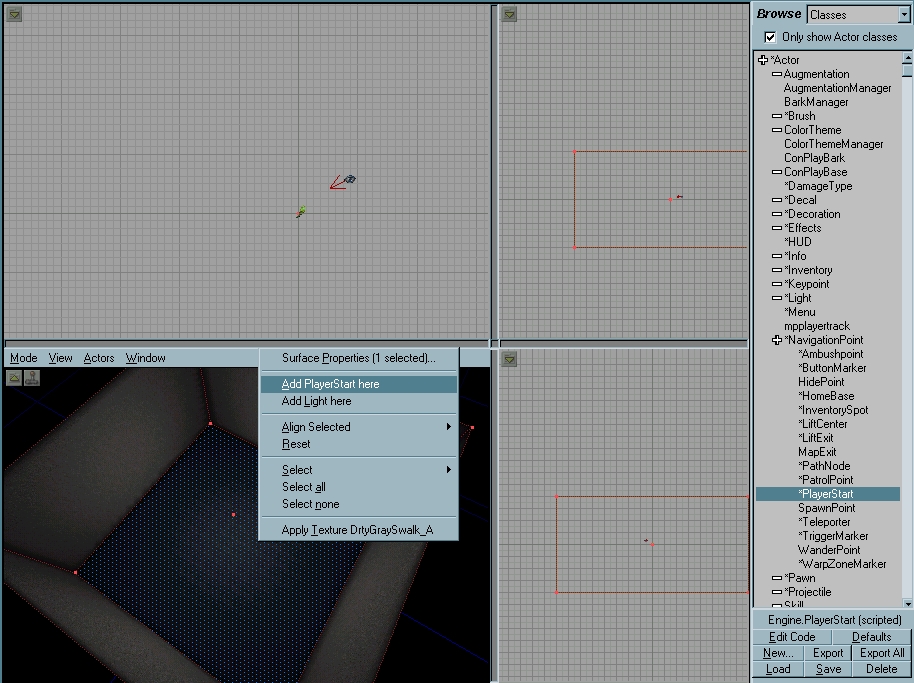
Ok, i bet you're dying to see what your room will actually look like in-game. No problem. In the drop down bar in the top right of the SDK, where you selected 'Textures', choose 'Classes'. Now instead of a list of Textures, a list of words appears. Expand the 'Navigation point' line by clicking the white line next to it in the list, and click '*PlayerStart'. Right click the floor in your map, and select 'Add *Playerstart here'.
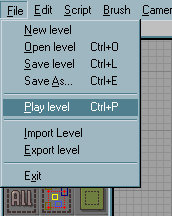
Rebuild the geometry like you did when you added the light, click 'file' at the top of the SDK, and select 'Play level'.
Your Very First room. Congrats!